New Home Computer - Hackintosh Style
Since my role change, I’ve been spending (a bit) less time on the road. From working in presales for about nine years, I’m used to working from a laptop, with a single external monitor when working remote. I wanted to switch back to dual monitors, but the MacBook Air I was using only supports a single external monitor. The first thing I tried was a USB3.0 DisplayLink adapter. I was actually pretty impressed with the performance out of it, but it had a number of small issues that was tough to get past with an everyday setup.
I decided to go for a desktop system and quickly eliminated the Mac Pro (overkill and pricey) and the iMac (I have monitors already). I started looking at Mac Minis, but to get them configured the way I wanted either was too costly or required a decent bit of disassembly.
I considered running windows, but I can’t stand Windows 8.1’s interface and while Win7 is fine, I don’t really like where Microsoft is going with the platform. Also I wanted something Linux/Unix.
I considered a Linux install like Mint or Ubuntu, but there are too many software packages missing Linux support (Google Drive, Syncplicity mainly).
I started looking into a build-your-own Mac aka a Hackintosh. I was concerned with supportability as I didn’t want to have constant issues with it. I started doing research to see if I could build my own Mac with a cost point and experience I would be happy with. The best source of info I found was from www.tonymacx86.com. There’s a hardware buyers guide, utility downloads, and a forum full of info.
After reviewing all the available details and price shopping, I decided this was the way to go. I could get a stable desktop platform with good specs and a reasonable price.
The Hardware
The main focus was on support- It had to be on the buyer’s guide and had to have out of the box (or close to it) support. The second focus was on environmentals- size/noise/heat. I want this to be a small desktop system so it couldn’t be like having a jet engine next to me.
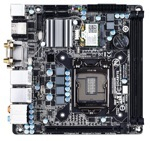
Motherboard- Gigabyte Z87N-WIFI
 I wanted a socket 1150 Haswell board that had enough onboard graphics ports and build in wireless. The 87 series boards are quickly being replaced by 97 series but I wanted to make this an easy deployment with something Apple already supports. The only issue with this model is the Mini-PCIe WiFi/Bluetooth Combo board only works for Bluetooth.
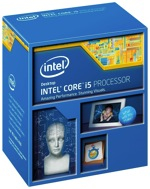
Processor - Intel Core i5-4690K
 the i5 was a good mix of price/performance that included integrated graphics that could drive multiple monitors. The K model allows for overclocking if I need to later. The i7 seemed like overkill for what I use and would require too much cooling. I stuck with the stock CPU cooler that came with the i5.
Power Supply - Corsair RM 550
 While I don’t think the PSU would make that much of a difference from a support perspective, I chose the Corsair because it was on the list. I moved up to the RM series to get modular power cables (only hook up what I need) and a quieter PSU (The fans don’t run on the RM unless needed).
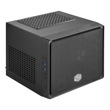
Case - Cooler Master 110
 I looked at cases for a while. I wanted something as small as possible while still allowing for good airflow and room to add a seperate 2-slot graphics card if I wanted one later. The CM 110 checked all the boxes and the reviews were good.
The Rest
Memory- Crucial Ballistix 16GB DDR3
Storage - Samsung 840 EVO 250GB SSD
Wireless- AzureWave AW-CE123H (This card is Mini PCIe and works for both WiFi 2.5/5GHz and BT 4.0)
Physical Assembly
This part was pretty straightforward PC-assembly stuff. Just take your time, read the directions, and have enough room to spread all your parts out.
Installation
There are two main pieces of software you need to install OS X on non-Apple hardware. Well, three. You need a copy of OS X (Mavericks in this case), and Unibeast and Multibeast. There are other options as well, but I chose to use the tonymacx86 tools.
Why not Yosemite you might be asking? 1) I’m looking for a stable daily-driver. Unsupported hardware coupled with Beta operating system doesn’t exactly scream stable.
To install, I followed the installation guide on tonymacx86.com.
The steps are basically this:
1. Make bootable USB installer on an existing Mac using Unibeast
2. Make sure your BIOS/UEFI settings are right (this is important! I found a few settings I had wrong that held me up)
3. Boot from the USB stick and run the installer. If it hangs on boot you can choose different boot options. I had to use -x for ‘safe mode’ for the installer to come up
4. Install OS X
5. Boot off the USB stick but pick your new install from the bootloader
6. Use Multibeast to install the bootloader on your new SSD as well as add any needed kexts (kernel extenstions aka drivers). There are plenty of guides on this part. Save your settings in case you need to re-apply them after an upgrade/update.
7. I had to use kextwizard to install two kexts for my wifi/bluetooth combo card- one for each chipset. There was a combo one that looked like it worked, but the bluetooth wouldn’t connect.
8. If you’re going to use iMessage, you also need to read this. Basically there are some values that iMessage reads from a Mac’s NVRAM that you’ll need to simulate. It’s pretty straightforward.
Post Install/Setup.
I decided not to use migration assistant to bring any settings over, and do it manually. I also wanted to replace some software I use regularly with some newer options.
My first move was using VirtualSwede’s OSX-Bootstrap. It installs homebrew and brew-cask and leverages these to install a ton of great software. Included in that are some ones that were new to me like Spectacle and flux.
I also installed HWMonitor to check to make sure my temps and fans were all right in my new setup.
So far it’s been up and running a few days with no real issues. I’m using both my 24” 1080p ASUS monitors as well as my Apple Bluetooth Trackpad with no issues.